

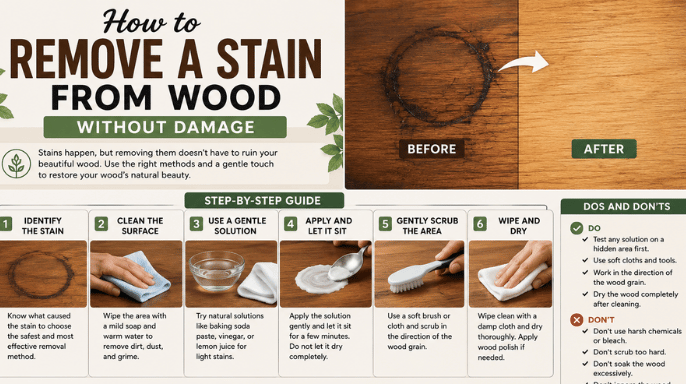
Learning how to remove a stain from wood starts with identifying what you’re dealing with. A white water ring, grease mark, dark moisture spot, and applied coloring product each need a different treatment. For surface marks, begin with a dry cloth and mild soap before trying stronger methods. For an old colored finish, you’ll usually need a chemical stripper, careful scraping, and light sanding. Always test your method in a hidden area first. You might also like Varnish.
| Type of mark | What it usually means | Best first treatment |
| White ring or cloudy patch | Moisture trapped in the finish | Gentle heat or mineral oil |
| Grease or food mark | Surface contamination | Mild dish soap and warm water |
| Dark or black patch | Moisture reached the timber | Light sanding or a suitable wood bleach |
| Old colored finish | Applied dye or pigmented coating | Stripper, scraper, and sanding |
Direct answer: Start with the least aggressive treatment. Blot up fresh spills, clean the area with mild soap, and dry it immediately. Treat white moisture rings with gentle heat or oil. Sand dark marks only when surface cleaning fails. To remove an applied finish, use a suitable stripper before sanding. There is more on this in Homemade Ant Bait.
Before You Start: Identify the Finish and the Mark
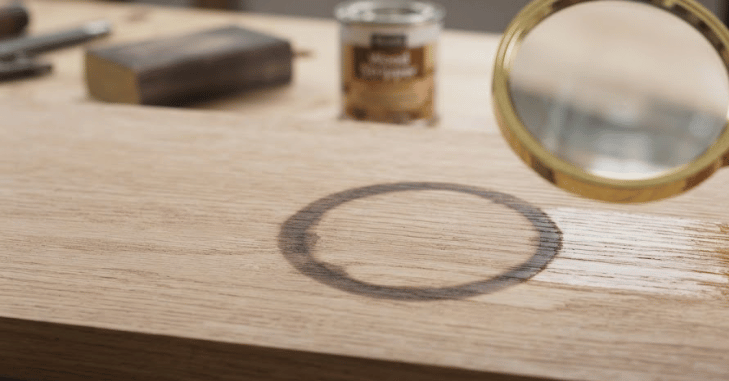
Before learning how to remove a stain from wood, assess the color, texture, and depth of the affected area. A pale or cloudy ring often means moisture is trapped in wax, lacquer, or another clear coating. A dark patch suggests that liquid has passed through the coating and reached the material beneath.
You should also determine whether the surface is solid timber, veneer, laminate, or engineered flooring. Thin veneer can be damaged by aggressive scraping or sanding. Engineered floors may also have limits on how much material can be sanded away.
Check Gladnota’s home improvement guides before planning a larger repair. For furniture that forms part of a room update, the interior design section can help you coordinate the repaired surface with the surrounding space.
What You’ll Need
Gather only the items required for your type of mark:
- Clean white microfiber cloths
- Mild dish soap
- Warm water
- Protective gloves
- Mineral oil or petroleum jelly
- A hair dryer with a low-heat setting
- Plastic scraper
- Wood-safe chemical stripper
- 100-, 150-, and 180-grit sandpaper
- Sanding block
- Tack cloth
- Drop cloth
- Safety glasses and dust mask
Avoid starting with steel wool, chlorine bleach, or a harsh multipurpose cleaner. These can scratch the coating, alter the color, or create a larger repair.
How to Remove Stain From Wood Step by Step
1. Blot Fresh Liquid Immediately
Press a dry, absorbent cloth over the spill. Don’t scrub it across the grain because that can spread the liquid. Replace the cloth as it becomes damp. Keep blotting until no more moisture transfers. Prompt action lowers the chance that coffee, wine, pet urine, or water will penetrate the protective coating.
2. Test a Hidden Area
Apply your chosen cleaner beneath the furniture, inside a cabinet, or along an inconspicuous floor edge. Wait until the test spot dries. Check for dullness, color transfer, softening, or swelling. Stop if the coating changes.
3. Clean Surface Dirt With Mild Soap
Mix a few drops of dish soap with warm water. Dampen a microfiber cloth, then wring it out until it feels almost dry. Wipe with the grain. Follow with a second cloth dampened with clean water, then dry the area at once. Don’t soak the surface. This method works well for food residue, light grease, fingerprints, and dirt sitting above the finish.
4. Treat a White Water Ring
Start with a hair dryer on its lowest heat setting. Hold it several inches above the surface and keep it moving. Check the ring every 20 to 30 seconds. Stop if the coating feels warm or soft. Excessive heat can damage lacquer, wax, or veneer adhesive.
If the ring remains, apply a thin layer of mineral oil or petroleum jelly. Leave it for several hours or overnight, then wipe it clean. Oil-based treatments may help displace moisture trapped near the surface.
5. Remove Grease Carefully

Use the mild soap method first. For a persistent spot, repeat the cleaning process rather than immediately increasing the strength. Don’t flood cabinet doors, tabletops, or floorboards. Too much moisture can enter joints, seams, or damaged coating.
A baking soda paste may remove some surface discoloration, but it is mildly abrasive. Use it only after testing, and rub with minimal pressure. Abrasive cleaning can leave a dull patch that is more visible than the original mark.
6. Address Dark Moisture Marks
Dark discoloration often means moisture has reached beneath the clear coating. Surface cleaning may improve the area, but it may not completely remove the color. Allow the area to dry before deciding what to do next.
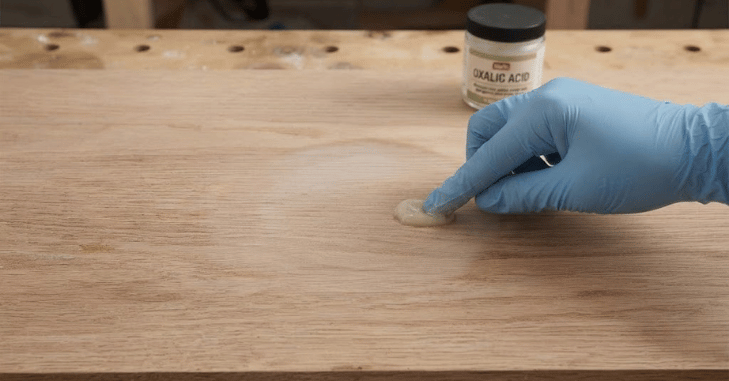
Lightly sand a small test area with the grain. Start with a medium grit only when necessary, then move to a finer grit to smooth the surface. Specialized wood bleach may lighten certain dark water or iron marks. Follow the product label, ensure adequate ventilation, and confirm that the product is suitable for the timber species.
The Home Depot also recommends choosing bleach designed for the relevant material rather than using a general household product.
For a floor, check the manufacturer’s sanding limits before removing material. A deep mark in thin veneer or engineered flooring may require professional repair.
7. Strip an Old Applied Finish
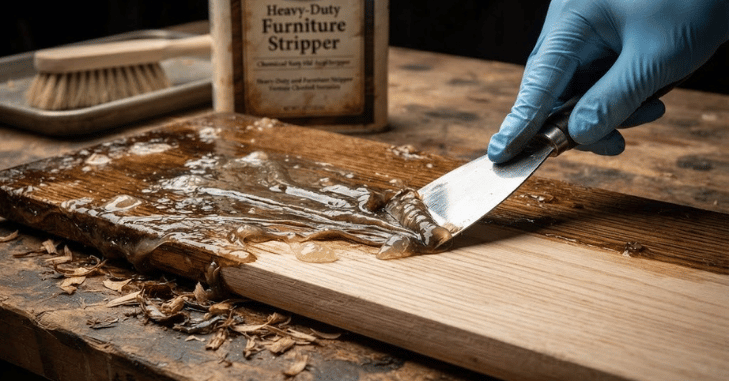
When the “stain” is an intentional colored coating, household cleaning methods won’t remove it evenly. Move the item to a ventilated workspace. Protect the floor, remove hardware, and clean the surface. Apply a compatible chemical remover in small sections according to its label.
Keep the product wet for the required dwell time. Once the coating softens, lift it with a plastic scraper. Work gently to avoid gouging the surface. Chemical removers commonly need about 10 to 20 minutes to soften a finish, but the manufacturer’s instructions should control your timing.
8. Sand and Prepare the Surface
Allow stripped timber to dry fully. Sand with the grain using 100- to 150-grit paper to remove remaining coating and rough areas. Follow with 180-grit paper for a smoother result. Remove dust with a vacuum and tack cloth. Don’t apply a new coating while dust, stripper residue, or moisture remains.
Which Method Should You Choose?

| Situation | Recommended method | Risk level |
| Fresh spill | Blot and dry | Low |
| Light grease | Diluted dish soap | Low |
| Whitewater ring | Low heat, then mineral oil | Low to moderate |
| Dark moisture patch | Drying, sanding, or specialist treatment | Moderate to high |
| Old colored coating | Chemical removal and sanding | Moderate |
The safest rule is to move from the gentlest option to the strongest. Don’t sand a mark that still sits on top of the finish, and don’t use a household remedy on an entire surface before testing it.
Common Mistakes to Avoid
- Scrubbing across the grain
- Leaving water on the surface
- Applying high heat in one place
- Using a metal scraper on soft timber
- Mixing cleaning chemicals
- Sanding through thin veneer
- Applying a new finish before the surface dries
- Skipping the hidden-area test
Never mix bleach with ammonia, vinegar, or other household chemicals. Use one product at a time and follow its label.
When to Call a Professional?
Professional help makes sense when the mark covers a large floor area, smells musty, returns after cleaning, or appears beside swelling and soft fibers.
You should also seek help for valuable antiques, thin veneer, complex inlays, or engineered flooring with an unknown wear-layer thickness. A specialist may be able to repair the affected section without refinishing the entire piece.
Apart from that, if you want to know about the article How to Clean Grout Lines, then visit our Home Improvement category.
Frequently Asked Questions
Begin with a dry cloth and diluted dish soap. Test a hidden area, use minimal moisture, and stop if the finish becomes cloudy or soft. Move to heat, oil, sanding, or stripping only when the mark type requires it.
Diluted vinegar may help with some organic marks, but its acidity can dull or damage certain finishes. Use it sparingly and test first. A mild soap solution is a safer starting point for most sealed surfaces.
You may be able to sand a shallow mark from solid timber. Deep discoloration, veneer, and engineered flooring need more caution. Confirm how much material can be removed before sanding.
Use a stripper to remove an old applied color or finish from detailed furniture, cabinets, or trim. Sanding alone can remove the top layer but may leave color trapped in the pores.
Drying time depends on humidity, the cleaner, and the stripping product. Some refinishing guides recommend allowing about 24 hours after stripping before sanding. Follow the product label and don’t continue while the surface feels cool or damp.