

Learning how to clean concrete starts with identifying the surface finish and the type of stain. Most outdoor slabs respond well to sweeping, mild detergent, firm scrubbing, and a thorough rinse. Oil, rust, mold, and paint need more targeted treatments. Avoid starting with the strongest chemical or the highest pressure setting. A careful, mild-first approach reduces the risk of discoloration, etching, damaged sealant, and streaks.
| Cleaning factor | Practical recommendation |
| Best starting cleaner | Warm water and mild dish detergent |
| Best brush | Stiff nylon-bristle brush |
| Typical working time | 30–90 minutes |
| Pressure washer required? | No, but it can speed up large outdoor jobs |
| Main safety rule | Never mix cleaning products |
| Surfaces needing extra care | Painted, colored, polished, stamped, or sealed slabs |
| Best time to clean outdoors | A mild, dry day without strong midday sun |
Direct answer: Clear the area, sweep away loose debris, wet the surface, apply a suitable cleaner, scrub stained sections, and rinse thoroughly. Begin with detergent and water before trying stronger products. Treat oil, rust, mold, and paint separately. Test every cleaner in a hidden area, especially on colored or sealed finishes.
Key Takeaways
- Start with the mildest cleaner that may solve the problem.
- Match the treatment to the stain instead of using one chemical everywhere.
- A pressure washer is optional for most household jobs.
- Protect plants, painted walls, doors, drains, and nearby vehicles.
- Never combine bleach with ammonia, acids, vinegar, or another cleaner.
- Test products before covering the whole area.
- Deep stains may improve without disappearing completely.
What You’ll Need
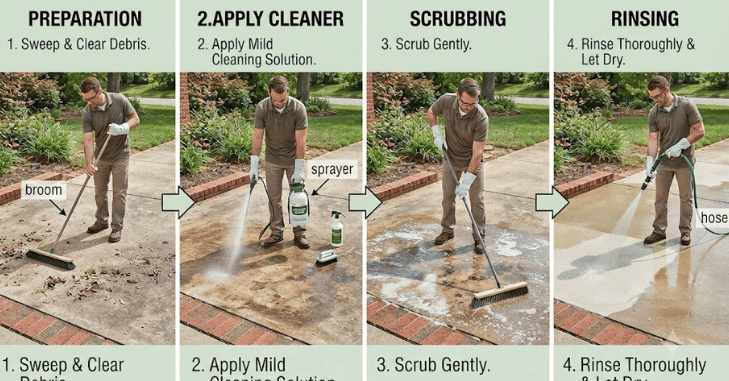
Gather your supplies before wetting the area:
- Outdoor broom or shop vacuum
- Garden hose with spray nozzle
- Bucket
- Mild dish detergent or a labeled concrete-safe cleaner
- Stiff nylon-bristle brush or push broom
- Absorbent material for fresh oil
- Protective gloves and safety glasses
- Plastic sheeting for nearby plants or walls
- Pressure washer, if appropriate
- Stain-specific product for rust, grease, mold, or paint
Avoid using a wire brush. Loose metal fibers can remain on the slab, rust, and create new orange marks.
How to Clean Concrete in Seven Steps?
1. Inspect the Surface
Check whether the area is bare, sealed, painted, stained, stamped, or polished. Look for cracks, loose coatings, crumbling edges, and previous repairs. A cleaner that works on a bare driveway may dull a decorative finish.
Review the coating manufacturer’s instructions before using bleach, acids, solvents, or high-pressure water. Also identify each mark. Dirt, tire residue, oil, rust, algae, paint, and white mineral deposits require different treatments.
2. Clear and Protect the Area
Remove furniture, plant pots, vehicles, rugs, tools, and toys. Sweep leaves, soil, grit, and other loose material from the slab. Cover delicate plants, nearby painted surfaces, electrical outlets, doors, and low vents.
Redirect runoff away from storm drains, ponds, lawns, and neighboring property. Cleaning a small test section first can reveal color changes before they affect a visible area.
3. Pre-Wet the Surface
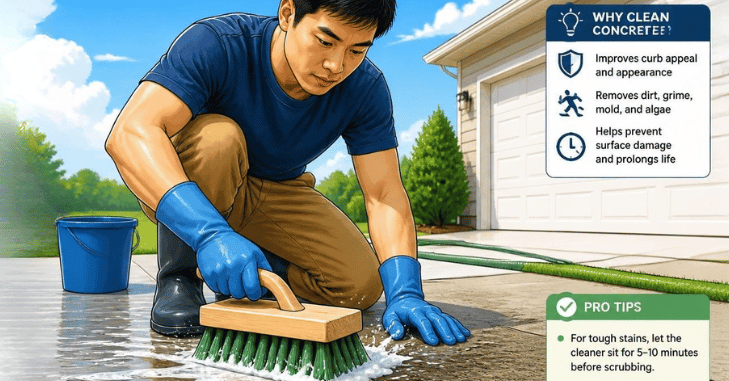
Lightly rinse the area with clean water. Pre-wetting loosens surface dirt and stops dry, porous paving from absorbing concentrated cleaner too quickly. Do not leave large puddles. The surface should be damp rather than flooded.
If you are cleaning next to a lawn or garden, wet the plants before and after the job. This step can reduce their exposure to stray detergent.
4. Apply a Mild Cleaning Solution
Add a small amount of mild dish detergent to warm water. Apply the solution evenly with a brush, mop, or pump sprayer. Let it sit for about five to ten minutes, but do not allow it to dry. Work in manageable sections during warm weather.
For a commercial product, follow its label for dilution, dwell time, protective equipment, rinsing, and surface compatibility. More concentrate does not always produce better results.
5. Scrub Methodically
Scrub with a stiff nylon brush. Use overlapping passes and spend more time on stained sections, corners, expansion joints, and textured areas.
A long-handled push broom is useful for patios and driveways. A smaller hand brush gives better control around edges and stubborn spots.
Apply a labeled concrete cleaner only where the basic detergent wash fails. Treating the entire slab with a strong product can create uneven color.
6. Rinse Thoroughly
Rinse from the highest point toward the drainage area. Continue until the runoff is clear and no foam remains. Cleaner left in pores can dry into streaks or attract new dirt. Check joints, low spots, steps, and edges for trapped residue.
Keep people and pets away while the area is wet. Algae, detergent, and loose grime can make the surface slippery.
7. Let the Area Dry and Recheck It
Allow the surface to dry fully before judging the result. Damp paving often looks darker, which can hide remaining marks.
Repeat a targeted stain treatment rather than washing the whole area again. Several mild applications are often safer than one aggressive application.
If a coating has started peeling, the slab is crumbling, or stains keep returning from below, cleaning alone may not solve the underlying problem.
Match the Cleaner to the Stain
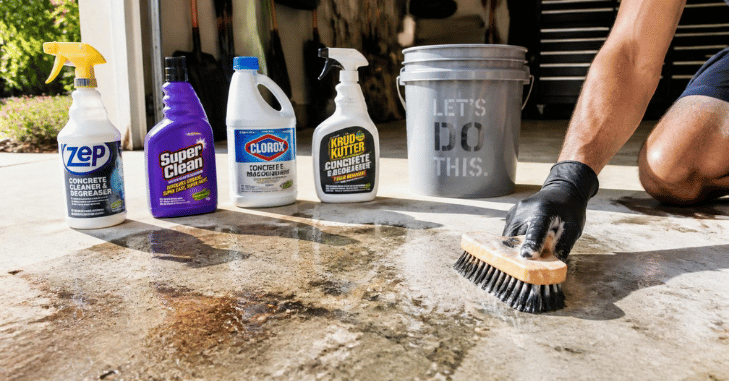
The Portland Cement Association recommends selecting a wet or dry treatment according to the stain. For example, grease may need a degreaser, while rust may require an acid-based stain remover.
| Stain | First treatment | Escalation option | Important caution |
| Fresh oil | Absorb excess, then use detergent | Labeled degreaser or poultice | Do not push oil deeper with water first |
| Old grease | Degreasing cleaner and firm scrubbing | Repeat treatment or use a poultice | Protect drains and plants |
| Rust | Product labeled for masonry rust | Oxalic- or phosphoric-acid-based remover | Acids may lighten or etch the finish |
| Mold or algae | Detergent and scrubbing | Oxygen-based outdoor cleaner | Fix shade, moisture, or drainage problems |
| Paint | Lift fresh paint and blot it. | Coating remover approved for masonry | Solvents may damage sealers |
| Tire marks | Degreaser and nylon brush | Commercial tire-mark remover | Test on sealed floors |
| White deposits | Dry brushing and water | Product made for mineral deposits | Confirm the moisture source first |
Oil and Grease
For a fresh spill, cover it with an absorbent material before adding water. Remove the saturated material in accordance with local waste rules. Next, apply grease-cutting detergent, scrub, and rinse.
A poultice to draw. Older marks may need a commercial degreaser or a poultice that draws oil from the pores. Do not use gasoline or another flammable solvent as a household cleaning shortcut.
Rust
Use a rust remover specifically labeled for masonry. Apply it only to the affected spot, observe the stated dwell time, and rinse promptly.
Acidic products can change the color or texture of the surface. Avoid casual use of muriatic acid, especially on decorative work.
Mold, Mildew, and Algae
Begin with detergent, water, and physical scrubbing. For persistent organic growth, use an outdoor mold treatment that lists masonry as a compatible surface. Cleaning will not prevent regrowth if water continues to collect. Trim dense vegetation, improve drainage, remove wet leaves, and increase sunlight where possible.
The U.S. Environmental Protection Agency advises against mixing chlorine bleach with ammonia-containing cleaners because toxic fumes can form. Ventilation and label compliance also matter when using disinfectants.
Paint and Coatings
Blot wet paint instead of spreading it. Once dry, scrape loose material with a plastic tool before applying a suitable remover. Test coating removers carefully. Some formulas soften sealers or leave a lighter patch around the original mark. Large spills, industrial coatings, and lead-based paint may require professional handling.
Using a Pressure Washer Safely

Sound, unsealed concrete driveways and walkways can generally tolerate pressure washing, but decorative coatings and damaged areas need more care. Consumer Reports identifies ordinary driveways and walkways as suitable surfaces for pressure washing.
Start with a wide fan nozzle and the lowest effective pressure. Hold the wand at a safe distance, test an inconspicuous section, and move in even overlapping passes.
Never use a zero-degree nozzle for routine household cleaning. Do not aim the jet at people, pets, windows, electrical equipment, joints, peeling coatings, or cracked edges.
High-pressure water can penetrate skin and footwear. OSHA accident records include serious injection injuries caused by pressure-washing equipment, so wear eye protection, closed footwear, and suitable clothing. Maintain a firm two-handed grip.
Cleaning Without a Pressure Washer
You can complete most small and medium jobs with a hose, a bucket, detergent, and a stiff-bristled brush. This method takes more physical effort, but it gives you greater control around painted walls, garden beds, weak edges, and decorative finishes.
When learning how to clean concrete without powered equipment, divide the area into small sections. Keep each section wet, scrub in overlapping passes, and rinse it before moving forward.
For stubborn isolated marks, repeat the treatment only on the stained spot. Do not increase the strength of every product at once.
Special Care for Indoor, Sealed, and Decorative Surfaces
Indoor floors usually need less water than outdoor paving. Vacuum or dust-mop first, then damp-mop with a neutral cleaner approved for the finish.
Do not flood a basement or garage where water cannot drain safely. Keep moisture away from drywall, timber framing, stored items, electrical equipment, and wall joints.
Polished concrete should normally be maintained with clean water or a mild, non-acidic product. Acidic cleaners may dull the sheen.
For sealed or colored finishes, do not assume that a household remedy is harmless. Vinegar, bleach, strong alkaline degreasers, and solvents may alter the coating. The safest choice is the sealer manufacturer’s recommended cleaner.
Common Cleaning Mistakes
Mixing Products
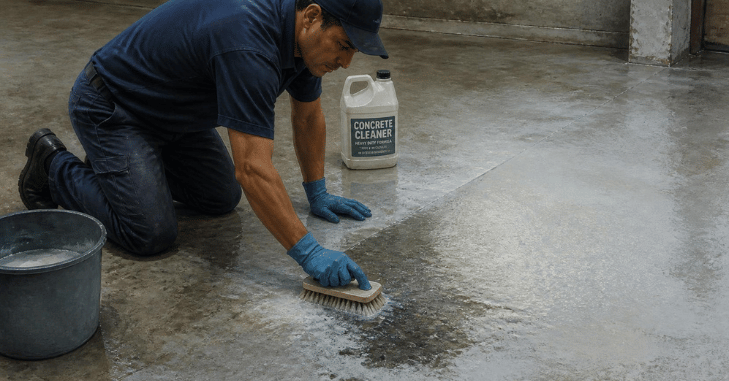
Never mix separate cleaning chemicals. Bleach can react dangerously with ammonia or acidic products. Use one treatment at a time, rinse thoroughly, and follow the label.
Letting Cleaner Dry
Dried detergent may leave pale residue or dark streaks. Work in smaller sections and keep the treated area damp during its stated dwell time.
Using Too Much Pressure
High pressure can expose aggregate, scar edges, remove coatings, and force water into joints. Begin gently and increase cleaning power only when needed.
Skipping the Test Patch
A hidden test helps reveal fading, etching, gloss loss, or coating damage. Let the test spot dry before treating the whole area.
Ignoring the Source of the Stain
Recurring algae may point to poor drainage. White deposits may indicate moisture movement. Repeated oil marks may require a drip tray or vehicle repair.
When to Call a Professional
Professional help may be worthwhile when:
- The affected area is large or heavily contaminated.
- Oil has penetrated deeply across a garage floor.
- A decorative coating is peeling or turning cloudy.
- The slab contains extensive cracks or crumbling sections.
- Paint may contain lead.
- Chemical runoff cannot be controlled safely.
- Mold or moisture keeps returning indoors.
- Grinding, blasting, or coating removal appears necessary.
A contractor can evaluate whether the problem calls for cleaning, repair, resurfacing, or resealing.
Next Step
Begin with one small test area using warm water, mild detergent, and a nylon brush. Once the section dries, compare it with the surrounding paving. Escalate only if the basic wash does not remove the stain.
Apart from that, if you want to know about the article Sewer Inspection, then visit our Home Improvement category.
Frequently Asked Questions
Warm water with a small amount of dish detergent is the safest starting option for ordinary dirt. Baking soda paste may help with small greasy spots. Test any homemade mixture before broad use, since acids such as vinegar may affect colored, polished, or sealed finishes.
Yes. Sweep it, pre-wet it, apply detergent, scrub with a stiff nylon push broom, and rinse with a hose. Treat old stains separately. Manual washing takes longer, but it reduces the risk of pressure damage.
Sweep it as needed and wash it when dirt, algae, oil, or slippery buildup appears. Shaded, damp areas may need attention more often than dry, sunny areas. Prompt stain treatment makes later cleaning easier.
It depends on the finish, surrounding plants, runoff route, and product instructions. Bleach may discolor coatings and damage vegetation. Never combine it with ammonia, vinegar, acids, or another cleaner.
Vinegar is acidic. Repeated or concentrated use may etch cement-based material, dull polished finishes, or affect some sealers. Use a labeled product when you are unsure about the finish.
Start with inspection, sweeping, water, mild detergent, nylon-bristle scrubbing, and a complete rinse. Test a hidden area first. Move to a stain-specific product only when the mild treatment fails.