

A damaged chair doesn’t always need new upholstery or a trip to the curb. Leather chair repair can fix many scratches, worn areas, shallow cracks, and small tears when the material is still structurally sound. The safest approach is to identify the upholstery first, clean the damaged area, test every product in a hidden spot, and then use the least aggressive repair that solves the problem.
| Leather Chair Repair | Best starting approach | DIY difficulty | Consider a professional when |
| Light scuff | Clean, condition, and buff | Easy | Color has been removed. |
| Surface scratch | Color-matched repair product | Easy to moderate | Scratch exposes deeper fibers. |
| Shallow cracking | Flexible filler, color, protective finish | Moderate | Cracks cover a large area. |
| Small clean tear | Backing patch, adhesive, filler, color | Moderate | Tear sits on a stressed seam. |
| Peeling surface | Identify material before repairing. | Moderate | Peeling is widespread. |
| Split seam or panel | Upholstery repair | Difficult | Stitching or panel replacement is needed. |
Direct answer: Most leather chair damage can be improved if you match the repair to the material. Clean and test first, condition light scuffs, use filler and colorant for shallow cracks, and reinforce small tears with a backing patch. Widespread peeling, split seams, or structural damage usually deserves professional assessment.
Key Takeaways
- Identify the upholstery before buying a repair kit.
- Start with cleaning and a hidden test patch.
- Use conditioner for light surface wear, not deep tears.
- Use thin filler and color layers instead of one heavy coat.
- Reinforce tears from underneath when the material has separated.
- Treat widespread peeling differently from ordinary cracking.
- Get a professional quote for seams, large tears, valuable furniture, or structural damage.
Leather Chair Repair: Match the Method to the Damage
Run your hand gently over the affected area after cleaning it. A light scuff that hasn’t removed material may need little more than an appropriate conditioner or color-restoring product, while a cut that opens when the seat flexes needs reinforcement. Current repair guides consistently recommend assessing the depth and type of damage before choosing filler, adhesive, dye, or a patch.
Also inspect the chair beyond the upholstery. A loose arm, wobbling leg, or separating wooden joint is a structural furniture problem, not a surface-leather problem. If the frame needs attention too, Gladnota’s guide to choosing wood glue for furniture repairs explains how PVA, epoxy, and other adhesives suit different joints.
Identify the Material Before You Repair It
The label under the chair or the manufacturer’s specifications are the safest ways to identify the upholstery. Genuine leather, heavily protected leather, bonded material, and synthetic upholstery do not respond to every cleaner, filler, or colorant in the same way. A product designed for one surface may leave another surface darker, glossier, sticky, or permanently discolored.
Pay close attention to peeling. Widespread flaking can occur on bonded or coated upholstery, and replacing a failed surface layer is different from filling a crack in intact hide. Localized peeling may sometimes be improved cosmetically, but extensive peeling can make replacement or reupholstery more sensible than chasing one damaged patch at a time.
What You’ll Need
You don’t need every item sold in a large restoration kit. Buy supplies that match the damage and the manufacturer’s stated upholstery type, and read the cure-time instructions before starting. Keep a clean work area because dust, skin oils, and residue can interfere with adhesion and color work.
- Soft white or microfiber cloths
- Leather-safe cleaner
- Compatible conditioner
- Flexible leather filler for cracks or surface loss
- Upholstery or leather adhesive for suitable tears
- Backing fabric for holes or separated cuts
- Small applicator or palette knife
- Fine scissors for loose fibers
- Color-matched repair compound or colorant
- Compatible protective finish or topcoat
- Protective gloves when required by the product label
If you’re working near finished wooden arms or legs, protect those surfaces before applying cleaners or colorants. Gladnota’s wood stain and finish care guide is useful when the furniture has both leather upholstery and exposed timber that needs separate treatment.
How to Repair a Damaged Leather Chair Step by Step
- Inspect the whole damaged area. Check whether you have a surface scuff, missing color, crack, tear, peeling coating, open seam, or combination of problems. Press the area lightly to see whether the damage opens when the upholstery flexes.
- Confirm the upholstery type. Check the manufacturer’s label, receipt, product page, or care instructions before using chemicals. Don’t assume a smooth brown or black surface is genuine leather based on appearance alone.
- Clean the repair zone. Use a cleaner approved for the material and remove dirt, body oils, and residue. Let the area dry fully before judging the true color and depth of the damage.
- Test the repair product. Apply a tiny amount to an inconspicuous location, such as the underside or rear edge. Let it dry before checking for unwanted changes in color, sheen, stiffness, or texture.
- Stabilize the damage. For a clean tear, a backing patch can support the damaged edges from underneath before filler is applied. For surface cracks, use flexible filler in thin coats rather than building one thick layer.
- Blend the surface and color. Apply compatible colorant in light coats and extend the blend slightly beyond the repaired spot if the product instructions recommend it. Thin layers are easier to control and usually create a less obvious edge than one heavy application.
- Allow the repair to cure. Follow the exact drying and curing times on the adhesive, filler, colorant, and finish you used. Avoid sitting on or flexing the repaired section early because movement can weaken a repair before it has fully set.
How to Handle Scratches and Scuffs
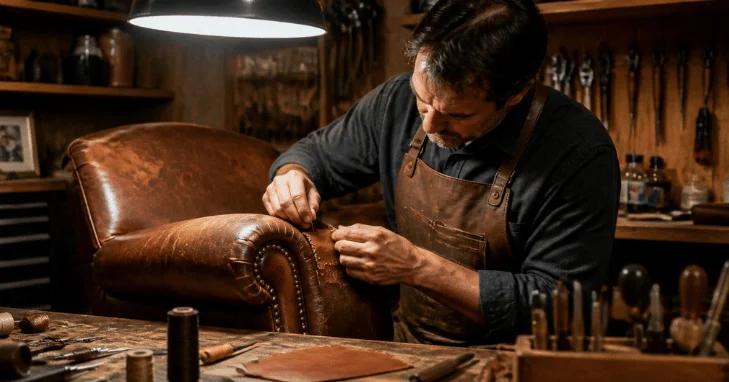
Start conservatively with light marks. After cleaning, a compatible conditioner or restoration cream may make a minor scuff much less noticeable, especially when the finish has been displaced rather than cut away. If the scratch exposes a lighter line or rough fibers, a color-matched product may be needed instead of repeated rubbing.
Avoid treating every scratch like a deep gouge. Sanding, heavy filler, or aggressive chemicals can enlarge a small cosmetic problem and create a patch with a different sheen. The same “identify the finish and start gently” principle also appears in Gladnota’s guide to removing scratches from finished stainless-steel surfaces, where surface type determines how aggressive a repair can safely be.
How to Repair Cracks and Small Tears
Shallow cracks usually need cleaning, stabilization, flexible filler, color correction, and a compatible protective finish. The goal is to rebuild a thin missing surface without creating a hard mound that flexes differently from the surrounding upholstery. Deep cracking across an entire seat is a different problem because the underlying material may already be too weak for a small spot treatment.
A small tear often needs support beneath the opening. Repair guides commonly use a backing piece under the cut, followed by adhesive or filler and then color blending once the area is stable. Open seams, torn stitching, and damage at high-stress edges are better candidates for upholstery work because the repair must handle repeated pulling as someone sits down.
What to Do About Peeling Leather
First, determine what is peeling. A damaged top finish on otherwise sound upholstery may be repairable with surface preparation, flexible repair material, and color, while widespread separation of a bonded or synthetic coating has greater limitations. Covering one flaky section doesn’t stop adjacent weak coating from failing later.
For that reason, judge the whole seat rather than the worst two-inch patch. If large areas are already lifting, cracking, and shedding, ask an upholstery professional whether panel replacement or reupholstery offers better value. A cosmetic DIY patch makes more sense when the failure is limited, and the surrounding material remains stable.
How Much Does Professional Repair Cost in the US?
Professional leather chair repair prices vary with location, damage size, color matching, construction, and whether the technician can work on-site. Current 2026 service examples put leather patching or spot work around $150–$400 in San Antonio and Austin, single-chair scratch or scuff work around $225–$250 in New York City, and many localized chair repairs starting near $300 in Los Angeles. Use those figures as planning examples rather than nationwide fixed prices.
A quote becomes easier to evaluate when you send clear photographs of the whole chair, the damaged section, and the material label. Ask whether cleaning, filling, color matching, sealing, travel, and any panel work are included in the quoted price. Repair often makes the most sense when the frame is sound, and the affected upholstery area is limited.
DIY Repair or Professional Restoration?
DIY is a reasonable choice for small cosmetic problems when you can identify the material and accept that the repaired area may remain slightly visible. It is also more practical on an everyday chair than on valuable antique or designer furniture. If the damage reaches stitching, a stressed edge, cushion structure, springs, or the wooden frame, the project has moved beyond a simple surface fix.
Professional assessment is also sensible when color matching or several sections have failed. Technicians may be able to stabilize, recolor, or replace a damaged panel without replacing the entire piece, but the right method depends on the chair’s construction. For more repair and maintenance topics around the home, Gladnota’s Home Improvement guides collect additional DIY and professional-planning resources.
Common Mistakes That Can Make the Damage Worse
Good preparation matters more than rushing to hide the mark. A repair that looks acceptable for one afternoon is not useful if stiff filler cracks, adhesive releases, or the color rubs off as soon as the seat flexes. Avoid these common shortcuts and follow the instructions supplied with each repair product.
- Skipping the upholstery-identification step
- Applying a cleaner or dye without a hidden test
- Using too much filler in one coat
- Trying to glue an open seam from the visible side
- Flexing or sitting on the repair before full cure
- Expecting conditioner to close an actual tear
- Treating widespread peeling as one isolated spot
- Trying to make a valuable antique look factory-new with a generic kit
How to Protect the Repair
Keep the chair away from strong direct sunlight and unnecessary heat where practical. Clean spills promptly with products approved for the upholstery, and avoid harsh household cleaners that can change the finish. Regular care won’t reverse structural cracks, but it can help prevent dirt and residue from accelerating visible wear.
Inspect high-use areas such as armrests, headrests, and the front edge of the seat before damage becomes extensive. Addressing a small scuff or opening seam early usually gives you more repair choices than waiting until material is missing. Keep the product names or color formulas from a successful repair so future touch-ups are easier to match.
Give the Chair a Careful Second Look Before Replacing It
A scratched, cracked, or torn seat can look worse than the underlying problem really is. Identify the upholstery, determine whether the damage is cosmetic or structural, and start with the gentlest compatible method before using filler, color, or adhesive. If the material is widely peeling, a seam has opened, or a repair must carry significant stress, get a professional assessment before committing to a DIY fix.
Frequently Asked Questions
Many scratches can be improved, but the result depends on depth and material loss. A light scuff may respond to cleaning and conditioning, while more serious damage can require filler, colorant, and a protective finish. If claws or another sharp object has torn through the material, reinforce the area instead of treating it as a surface scratch.
Small professional jobs can cost a few hundred dollars, though US prices vary widely by city and repair scope. Current service examples show localized work from roughly $150–$400, with some metro-area chair specialists starting around $225–$300. Get a photo-based written estimate before deciding whether repair, panel replacement, or reupholstery offers better value.
A kit may improve a small localized area if it is compatible with the upholstery. Widespread peeling is harder because nearby coating may continue separating after the visible patch is repaired. Identify whether you have genuine, bonded, or synthetic material before choosing a filler or color product.
Replacement becomes more reasonable when upholstery failure is widespread, and the chair also has major frame, spring, foam, or mechanism problems. Compare the complete repair quote with the cost and expected life of a replacement rather than looking only at one damaged spot. Sentimental, antique, or high-quality pieces may still justify professional restoration even when the work costs more.