


A hand planer removes thin layers of wood to flatten surfaces, straighten edges, reduce thickness, and improve a board’s finish. Manual models offer control and accuracy, while electric models remove material faster. The right choice depends on whether you’re doing fine furniture work, fitting doors, preparing rough lumber, or handling quick home repairs.
Direct answer: Choose a manual plane when precision, quiet operation, and surface quality matter most. Choose an electric model when you need to remove material quickly from doors, beams, or wide boards. Beginners usually get more everyday value from a block plane or No. 5 jack plane than from a specialized model.
| Key points about the hand planer | Practical guidance |
| Main purpose | Flattening, smoothing, trimming, and shaping wood |
| Good beginner choice | Block plane for small jobs or jack plane for general work |
| Manual or electric | Manual for control; electric for fast stock removal |
| Cutting direction | Work with the wood grain when possible. |
| Essential setup | Sharp blade, shallow cut, flat sole, secure workpiece |
| Main safety concern | Contact with the blade or powered cutter head |
| Maintenance | Clean, dry, sharpen, and protect the sole from rust |
Key Takeaways
- A block plane handles end grain, chamfers, and small fitting jobs.
- A jack plane is the most flexible choice for general woodworking.
- Longer jointer planes help flatten faces and straighten long edges.
- Smoothing planes take fine final shavings before finishing.
- Electric models work quickly but require more care and can remove too much wood.
- Sharp blades and shallow passes produce cleaner, more predictable results.
What Does a Hand Planer Do?

A hand planer uses a sharp cutting iron that projects slightly through a flat sole to shave thin layers of wood from a surface. As the hand planer moves across the board, the blade removes raised fibers in fine shavings, creating a smoother and more even finish.
The sole of the hand planer rides over high spots while repeated passes gradually flatten the surface. Longer hand planers bridge more of the board, making them ideal for straightening long edges and flattening wide faces. Shorter hand planers follow local variations more closely, giving you better control when working on small projects or detailed woodworking tasks.
Common jobs include:
- Removing saw marks
- Trimming a sticking door
- Straightening a board edge
- Flattening rough lumber
- Cutting a small chamfer
- Smoothing a surface before applying a finish
- Adjusting a joint that fits too tightly
A hand planer is an essential woodworking tool for building furniture, fitting doors, preparing lumber, and completing a wide range of home improvement projects with precision.
Common Types and Their Uses
Each plane is designed around its sole length, blade position, cutting angle, and intended task.
| Type | Typical use | Good for beginners? | Main limitation |
| Block plane | End grain, chamfers, touch-ups | Yes | Too short for flattening long boards |
| Smoothing plane | Final surface preparation | Yes | Not designed for heavy stock removal |
| Jack plane | General flattening and sizing | Yes | Less precise than a long jointer on large boards |
| Jointer plane | Long edges and wide faces | Sometimes | Heavy, long, and more expensive |
| Scrub plane | Fast removal from rough stock | No | Leaves a coarse surface |
| Electric model | Doors, beams, and quick trimming | Sometimes | Easier to create dips or tear-out |
Block Plane
A block plane is compact enough for one-handed use. It works well on end grain, small edges, miters, and light fitting work.
Many models use a blade mounted bevel-up at a relatively low angle. That design helps with cross-grain and end-grain cuts. Typical block planes are about three to seven inches long.
This is a practical first purchase for homeowners who need to trim doors, soften sharp edges, or adjust small wooden parts.
Jack Plane

The jack plane is the general-purpose option. A typical No. 5 model is about 14 inches long and can remove moderate amounts of wood while still helping flatten a surface.
Woodworkers often use it after a scrub plane and before a jointer or smoothing plane. It can also perform several of those roles on smaller projects when its blade is set correctly.
For a small workshop, this flexibility often makes a jack model the strongest first bench-plane purchase.
Smoothing Plane
A smoothing plane takes fine shavings from a surface that is already close to flat. The common No. 4 model is shorter than a jack or jointer.
Its job is not to correct a badly twisted board. It removes small tool marks and surface imperfections before finishing. A properly tuned smoother can leave a surface that needs little sanding.
Jointer Plane
The long sole of a jointer plane bridges low spots and cuts raised areas. This makes it useful for straightening board edges before gluing panels.
Common No. 7 and No. 8 models are usually around 22 to 24 inches long. Their size improves consistency on long stock, but it also adds weight and cost.
Electric Model
An electric model uses a rotating cutter head to remove wood quickly. It is suited to rough trimming, reducing a door edge, shaping beams, and removing high spots.
It is not a direct replacement for every manual plane. The powered cutter can remove material too quickly for delicate fitting work. It may also leave scallops or tear-out if the depth setting, feed speed, or grain direction is wrong.
How to Choose a Hand Planer
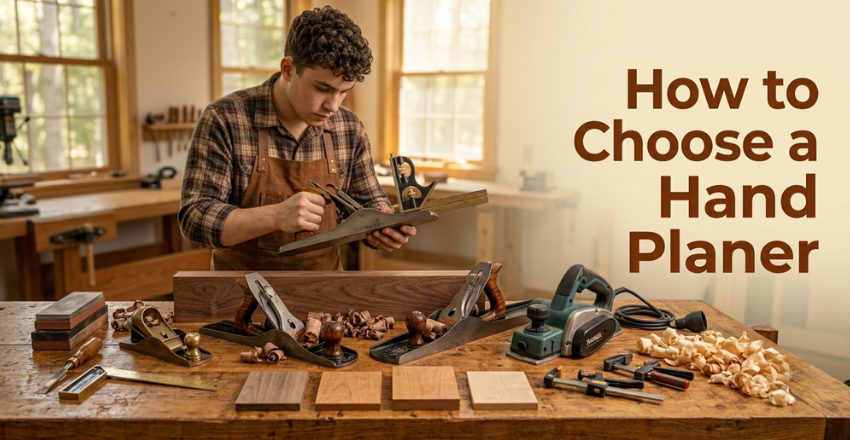
Start with the work you expect to do most often.
Choose a block plane when you need a compact tool for repairs, end grain, chamfers, or small adjustments. Select a jack plane when you want one manual tool for flattening, sizing, and general bench work.
A smoother makes sense when surface preparation is your priority. A jointer becomes useful when you regularly work with long boards or glue up solid-wood panels.
Consider these buying factors:
Flat sole: A stable sole helps the tool register consistently on the board.
Blade adjustment: Depth and lateral controls should move smoothly without excessive play.
Blade quality: A thick iron blade can reduce chatter, but any blade still needs proper sharpening.
Comfort: The tote and front knob should suit your hands and working position.
Replacement parts: Check whether blades and adjustment components are readily available.
Project scale: Small repairs do not require a long, heavy jointer.
Power source: For electric tools, compare corded convenience with battery compatibility.
A manual option also creates less noise and airborne debris than a powered cutter. An electric tool is faster when stock removal matters more than fine control.
How to Set Up and Use It
1. Secure the Board
Clamp the workpiece to a stable bench. The board should not rock, slide, or lift during the cut.
Check for screws, nails, staples, and embedded grit. Metal can damage the blade and may create a safety hazard.
2. Check the Blade
The cutting edge should be sharp, clean, and free from chips. Most plane irons use a primary bevel near 25 degrees, though the final honing angle can vary by tool and task.
Retract the blade before making adjustments. Then advance it until it barely projects through the mouth.
3. Set a Shallow Cut
Begin with the lightest cut that produces continuous shaving. Deep cuts require more force and increase the chance of tear-out.
Adjust the lateral lever so the blade projects evenly across the sole. Test the setting on scrap from the same wood species.
4. Read the Grain
Look at the fibers along the edge of the board. Plane in the direction that keeps the fibers lying down rather than lifting ahead of the blade.
When the grain reverses, reduce the cutting depth and skew the tool slightly. A sharper iron and tighter mouth can also improve the result.
5. Use Balanced Pressure
At the start of the stroke, apply more downward pressure near the front. During the middle, balance the pressure between both hands.
Near the end, shift pressure toward the rear handle. This method helps prevent rounding at the beginning and end of the board.
6. Check Progress Often
Use a straightedge or winding sticks to locate high spots. Pencil marks across the face can also show where material remains.
Take several controlled passes instead of trying to reach the final size at once. Measure frequently when fitting a door, joint, or finished part.
This approach is useful during larger renovation projects where small fitting errors can affect trim, cabinetry, and hardware alignment.
Safety Tips
Manual tools can cause serious cuts, while powered models add electrical, noise, dust, and rotating-blade hazards.
OSHA recommends using the correct tool, inspecting it before work, maintaining it properly, following the manufacturer’s instructions, and wearing suitable protective equipment. Powered tools should be disconnected before cleaning, servicing, or changing cutters.
Follow these precautions:
- Keep hands behind the cutting edge.
- Clamp the board instead of holding it in your lap.
- Retract or cover the iron before storage.
- Wear eye protection when using powered equipment.
- Use hearing protection with loud electric tools.
- Connect dust collection when the model supports it.
- Keep cords away from the cutting path.
- Wait for the cutter head to stop before setting an electric tool down.
- Never adjust a powered unit while it remains connected to electricity or a battery.
Wood dust can irritate the eyes, skin, and respiratory system. Dust extraction and suitable respiratory protection become more important during repeated powered work.
Common Mistakes to Avoid
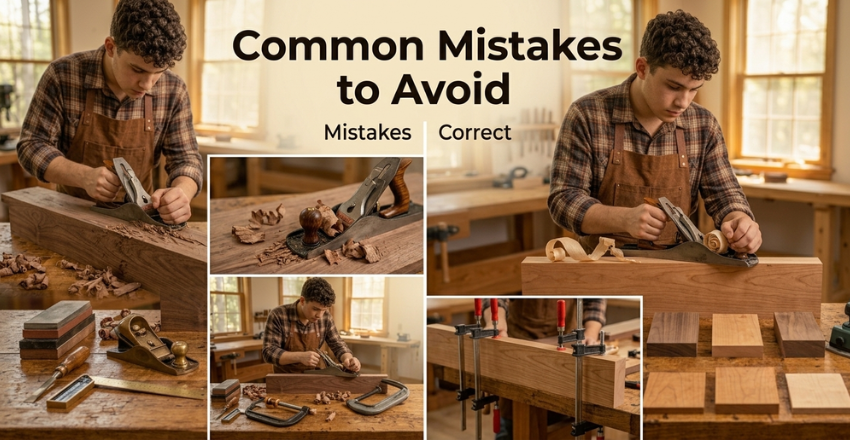
Taking Too Deep a Cut
A deep setting makes the tool harder to push. It also increases chatter and torn grain. Retract the iron and advance it in small increments.
Using a Dull Blade
A dull edge requires force and produces inconsistent shavings. Sharpen the iron before making any other adjustments.
Planning Against the Grain
Cutting into rising fibers can pull chunks from the surface. Reverse direction or take a lighter, skewed pass.
Rounding the Ends
Excess pressure at the wrong point can create a low spot at either end. Shift the downward force from the toe to the heel as the tool moves.
Expecting One Tool to Do Everything
A short block model cannot flatten a long board as reliably as a jointer. An electric unit cannot match a well-tuned smoother for delicate finishing.
Cleaning and Maintenance
Brush shavings from the mouth after use. Wipe moisture and fingerprints from metal surfaces, then apply a thin coat of rust-preventive oil.
Store the tool on its side or with the blade retracted. Do not leave the cutting edge resting against a hard bench.
Sharpen when the tool needs more force, stops producing continuous shavings, or leaves crushed fibers. Check screws and adjustment parts for looseness before starting the next project.
Good tool care supports accurate woodworking in furniture projects and other interior design upgrades.
Next Step
Match the tool to your most common project rather than buying the largest model. Start with a sharp blade and scrape wood. Practice producing thin, continuous shavings before working on a door, cabinet part, or finished board.
Once the setup feels predictable, use your hand planer for small fitting jobs and gradually move to longer surfaces.
At Gladnota, we help you choose the right tools and complete every woodworking project with confidence.
Conclusion
A hand planer is one of the most useful woodworking tools for flattening, smoothing, trimming, and fitting wood with accuracy. Whether you choose a manual plane for precision or an electric model for faster material removal, selecting the right type, keeping the blade sharp, and using proper setup and safety techniques will produce better results.
By matching the tool to your projects and practicing light, controlled cuts, you can improve the quality of your work, extend the life of your equipment, and complete woodworking and home improvement projects with greater confidence.
Apart from that, if you want to read more articles like this, then visit the Gladnota “home improvement” category.
Frequently Asked Questions
Yes, when you expect to trim wood, clean up edges, fit doors, or build furniture. A block model is useful for small jobs. A No. 5 jack model offers greater flexibility for bench work.
Choose a block plane for repairs, end grain, and small parts. Choose a jack plane for flattening boards and broader woodworking tasks.
Common causes include planing against the grain, taking too deep a cut, using a dull iron, or leaving the mouth too open. Start by sharpening the blade and reducing the cut.
It can remove high areas, but achieving a truly flat face takes skill and frequent checking. A jointer, thickness machine, router sled, or long manual plane may give more predictable results.